"Creation of a closed-end flute"
(click on pics to enlarge)
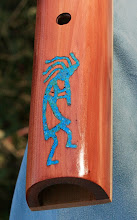
In my crop of new flutes, I glued up several 'closed-end' flutes. Instead of the regular bore hole at the 'foot' of the flute, you can cut the bore and leave solid wood at the end, giving me room to carve whatever it is I want to tackle.

Of course, I have to tap a hole at the end of the bore, which in this case I opted for an oblong hole on the bottom side of the flute. The air has to be able to escape to make the sound; I could have easily done a more traditional pattern of 4 holes around the flute, drilled in roughly the same area and leaving the end solid, but I prefer the finished view to not see the hole unless you flip it upside down...
 I designed this particular flute (Ambrosia Maple, keyed to F#) with a bit longer and wider solid area, as I wanted to carve one of the woodpeckers I've photographed lately. If you follow my "Blah-Blah" blog, you've seen my Downy and Hairy Woodpecker pictures; they are quite similar except in relative size. I'll paint this one as a Downy but make it have a bit sturdier beak like the Hairy...maybe I'll call him "Hairy Downy, Jr." or something like that!
And once the weather clears I'll go outside and start power carving the solid area and shape it into what hopefully will look like a very realistic woodpecker. In this case, the head will be turned chin-up and in line with the body...the wings will be folded over the body, and the tail feathers will extend close to the lowest playing hole. Yes, this is tricky and quite time-consuming, but the results are worth it...
 While not the sharpest of my bird pics, this one (rotated) will come in very handy...the one thing I lacked was a clear idea of what the backside of the Downy looked like, since books and photos show mainly side views. This picture was exactly what I needed when I reach the final painting stages.

Now, if I can only find my stash of 36-hour days to get it finished in a timely manner....

Of course, I have to tap a hole at the end of the bore, which in this case I opted for an oblong hole on the bottom side of the flute. The air has to be able to escape to make the sound; I could have easily done a more traditional pattern of 4 holes around the flute, drilled in roughly the same area and leaving the end solid, but I prefer the finished view to not see the hole unless you flip it upside down...
 I designed this particular flute (Ambrosia Maple, keyed to F#) with a bit longer and wider solid area, as I wanted to carve one of the woodpeckers I've photographed lately. If you follow my "Blah-Blah" blog, you've seen my Downy and Hairy Woodpecker pictures; they are quite similar except in relative size. I'll paint this one as a Downy but make it have a bit sturdier beak like the Hairy...maybe I'll call him "Hairy Downy, Jr." or something like that!
And once the weather clears I'll go outside and start power carving the solid area and shape it into what hopefully will look like a very realistic woodpecker. In this case, the head will be turned chin-up and in line with the body...the wings will be folded over the body, and the tail feathers will extend close to the lowest playing hole. Yes, this is tricky and quite time-consuming, but the results are worth it...
 While not the sharpest of my bird pics, this one (rotated) will come in very handy...the one thing I lacked was a clear idea of what the backside of the Downy looked like, since books and photos show mainly side views. This picture was exactly what I needed when I reach the final painting stages.
Now, if I can only find my stash of 36-hour days to get it finished in a timely manner....


