A little tool talk...
It would take many volumes to go through all I do and use and why and how I came to those decisions...but in this forum/format I can throw out tidbits willy-nilly that will give you a fuller picture of what drives me in my flute-making.
ALWAYS remember that, to coin the phrase, there's more than one way to skin a cat. In flute making, there's no one way to do anything...we all find our groove and hone in on our 'truth' and the chips fall where they may. And with those chips fall all that fine dust that gets EVERYwhere...
 I don't use a lathe. Never been around one or used one. No doubt they significantly speed up the rounding process, but I don't go that route. I use my DeWalt 735 13" planer for squaring up a glued-up flute blank, a pricey but invaluable tool for me. A Delta router-shaper table knocks off a 45-degree angle to take my flutes to a hexagon stage, ready for rounding.
 I'm leaving out the voicing and key determinations...'nuther post for a 'nuther day. Skipping to rounding the flute out. My go-to tool has for years, now, been the Ridgid Oscillating Belt Sander. Slap on a 80-grit belt and I can start shaving off the corners and getting a general roundness to the flute. It's not a quick process, mind you, and you have to constantly remind yourself to let the tool do the work and not to force extra pressure, etc.
 Once I'm content with the general shape (albeit rough), I switch to a Porter-Cable oscillating 5" palm sander, starting with the same grit. Even with an anti-vibration glove, you can only work with this tool for so long before the vibration gets to you (that and the grip needed to one-hand the tool). I may can work 2 hours with it, but that's about my limit. Whether I lay the flute in my lap or hold it in my left hand and brace it into the upper part of my left arm, I constantly move the sander in small circles that wrap around the barrel as I go. There are no short-cuts to these steps. Move to a grit too high too soon and you'll have to back-track to the lower grit. There really is an art and science to the sanding process.
In an earlier post I mentioned the water stage I do at 320-grit, so I won't repeat that here...I do have 600 and 800 grit discs for the sander, but once at the 1,000 grit stage I'm working it by hand. Total sanding time will vary with flute size and wood type. Cedar shapes quickly and easily, where an equal flute in Bubinga will take a minimum of twice as long given the hardness of that wood.
I had used an oscillating spindle sander that Ryobi used to make, but I haven't seen it in years. I like the Ridgid, though in 5 years I've burned through 3 motors. I wish it were more industrial and beefy, but in its defense it's the only sander like it on the market. There are some 'tougher' spindle sanders out there, and in time I just might switch to one when I burn out my current Ridgid sander. A matter of when, not if, unfortunately.
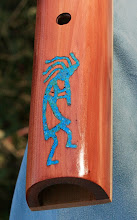
Anyway, that's how an Ugly Boy gets its shape!
It would take many volumes to go through all I do and use and why and how I came to those decisions...but in this forum/format I can throw out tidbits willy-nilly that will give you a fuller picture of what drives me in my flute-making.
ALWAYS remember that, to coin the phrase, there's more than one way to skin a cat. In flute making, there's no one way to do anything...we all find our groove and hone in on our 'truth' and the chips fall where they may. And with those chips fall all that fine dust that gets EVERYwhere...
 I don't use a lathe. Never been around one or used one. No doubt they significantly speed up the rounding process, but I don't go that route. I use my DeWalt 735 13" planer for squaring up a glued-up flute blank, a pricey but invaluable tool for me. A Delta router-shaper table knocks off a 45-degree angle to take my flutes to a hexagon stage, ready for rounding.
 I'm leaving out the voicing and key determinations...'nuther post for a 'nuther day. Skipping to rounding the flute out. My go-to tool has for years, now, been the Ridgid Oscillating Belt Sander. Slap on a 80-grit belt and I can start shaving off the corners and getting a general roundness to the flute. It's not a quick process, mind you, and you have to constantly remind yourself to let the tool do the work and not to force extra pressure, etc.
 Once I'm content with the general shape (albeit rough), I switch to a Porter-Cable oscillating 5" palm sander, starting with the same grit. Even with an anti-vibration glove, you can only work with this tool for so long before the vibration gets to you (that and the grip needed to one-hand the tool). I may can work 2 hours with it, but that's about my limit. Whether I lay the flute in my lap or hold it in my left hand and brace it into the upper part of my left arm, I constantly move the sander in small circles that wrap around the barrel as I go. There are no short-cuts to these steps. Move to a grit too high too soon and you'll have to back-track to the lower grit. There really is an art and science to the sanding process.
In an earlier post I mentioned the water stage I do at 320-grit, so I won't repeat that here...I do have 600 and 800 grit discs for the sander, but once at the 1,000 grit stage I'm working it by hand. Total sanding time will vary with flute size and wood type. Cedar shapes quickly and easily, where an equal flute in Bubinga will take a minimum of twice as long given the hardness of that wood.
I had used an oscillating spindle sander that Ryobi used to make, but I haven't seen it in years. I like the Ridgid, though in 5 years I've burned through 3 motors. I wish it were more industrial and beefy, but in its defense it's the only sander like it on the market. There are some 'tougher' spindle sanders out there, and in time I just might switch to one when I burn out my current Ridgid sander. A matter of when, not if, unfortunately.
Anyway, that's how an Ugly Boy gets its shape!