Wednesday, May 27, 2009


The analogy of a Cracker Jack box comes to mind, where you get a cardboard box that is full of not only sweet things but a surprise that delighted me as a little kid. OK, point taken, I spent little of my life actually 'little'...but this particular 'kid' (as I call all my flutes) has thoroughly done that, delighted me. In case you didn't see yesterday's post, here it is in all it's fibrous glory...

(click on pics to enlarge)

...the now-Ugly-Boy when it was just a throw-away stick...

[Lest I forget, it's a high B tuned to Verdi frequencies (A432) and is ~24 inches long] Once glued, then tapped for sound and voice, the careful sanding began. I wanted to remove the oxidized stuff and yet I didn't want to remove 'character' that I was seeing, and there was a lot of it. With a magical break in the weather, I quickly photographed what I now call "The Howler"...as I was photographing some of the wonderful intricate detailed grain patterns, this one jumped out at me as a ululating wolf...see if you can see it, too...

For those that had any trouble seeing it, I did a little key fer ya...


This flute is just loaded with interesting patterns...


As above and below, there were voids that I had to fill in...while I could have used something like Turquoise or malachite, I decided to stay 'natural' and used cedar dust. I simply would add a watery superglue and press the dust in, then 'water' the top with the watery glue. Makes a rock-hard and pretty inlay, if I do say so myself.

I mentioned in yesterday's post about avoiding sticks with pronounced splits, as such cracks are rarely singular in nature or on the same plane. Case in point for this flute as a couple of large pieces flew off when cut with the saw and also with the Kutzall bit I used to rout out the chambers. In this case it was easier to fill it in as opposed to go look for the wood or try to custom fit some odd piece in the void...all part of the 'on the fly' decisions I have to make.

The mouthpiece ended up being quite wide where I had decided to cut the branch...so instead of boring the hole and then shaping down to the opening like I would normally do, I left it as-is and had this flash to simply use a sander and make it concave. Never done it before, never seen it, but it is really easy to play and so I've given the design an appropriate monikor: "The Kisser". That's how you play it, just 'kiss' it and blow...

Here are a few views of the almost-finished flute, the High B "Howler"...


Not too bad a transformation of kindling, eh? Carpe diem, y'all!

Tuesday, May 26, 2009

THE MAKINGS OF A BRANCH FLUTE...

(click on pics to enlarge)


Ah, even the best laid plans...

Our Carolina weather pattern of late has been the pits for getting stuff done outdoors, including putting on flute finishes indoors, thanks to the sky-high humidities. I was hoping to do a cute little 'family tree' post on my new family of 'branch flutes', but the photography I want to do isn't going to happen any day soon, so it appears...

So I thought you might find it interesting how this new little offshoot began for me, and I pulled together some pictures to put it all into perspective. To set the stage, there have been flute makers that do nothing but make natural branch flutes, so it's nothing new...what is new for me is the 'look' and 'approach' and 'technique' as well as the sheer joy of seeing and hearing the finished product.

Going back a couple of years, a very special wooded area was 'harvested' in a very ugly manner, all due to a tiff between a local doctor and his local municipality.

I vowed to collect some of the 'trash' Cedar and Dogwood trees and incorporate them into flutes, so that they could be a part of healing music to go back out into the world in a positive way. I wasn't thinking branch flutes at the time, but I would still start at the same place regardless of what flute style I made. After the dust settled, I began to scout for good specimens...

Of course, the possibilities were almost unlimited...what was limited was a space to store selections since it would take a couple of years for 'green' wood to dry. However, this area had some 'dead standing' trees already, which is preferable to dead trees lying on the ground where they can rot more quickly over the years. I was able to use some of the dead Cedar immediately as it was already dry, and just recently began incorporating Dogwood. Now that I've started making some branch flutes, I go back to the area and still rather easily find some pretty good wannabes, which is why I carry a handsaw under Mercy's quilt in the back of the car!...

This post is about just one particular piece I began to finish up last week, a piece I could have easily argued wasn't worth looking at twice and passed over. I think it might be an old Dogwood branch, but it was so 'dead' already I couldn't tell with much confidence. It was a hardwood that was now softer inside thanks to initial drying and decay.

Today will simply be the beginning images...the finished flute (well, except for a couple of more finish coats when I can get 'em put on!) is sitting ready for pictures...and it turned out beautifully, all things considered. That last phrase is because these flutes take a LOT of handwork, especially for hole and crack filling, and then the whole unique sound 'issues' that have to be calculated and solved especially for curvy pieces like this one...


I did lightly knock off what bark was left on this dead branch so that I could get a better look at what cracks and blemishes were where; too, you have to envision which end will be the mouthpiece...which will be the foot...where the sound hole 'nest' will go...which will be the more ergonomic placement for finger holes...where the musical 'end' of the flute will be so you can drop in a tuning hole(s) to keep more of the stick for aesthetics...

Since this is all still new to me and a constant work in progress, I will be shying away from flutes with noticeable cracks, unless they are solitary ones. The process is that I cut the branch in half with a band saw, cut out the insides with various tools to specifications I draw up for a particular branch, then glue it back together. With large cracks, they are rarely straight up and down and in one plane; rather, they usually exist in groups on multiple planes, and when you make a cut with a band saw, which is one plane, or even in the hollowing stage, you risk cracked pieces flying off as you cut into the flute, many times making the wood firewood!

Here is what I came up with for this particular piece:

I'm obviously leaving a lot out about, say, how I know I need a tuning hole in that particular location, etc. That's a function of the approximate diameter of the bore I'm cutting out versus length of barrel I cut out...which has as the starting point at the 'nest' area and the TSH (true sound hole, in front of the block)...if you think there is a lot of blind trust and faith in this process, you are correct! But that's the beauty of being an artist and making unique creations: there ain't no guide book. You go within and listen to your intuition and follow your inspiration.

Last week I was adding the four new branch flutes to the 'family tree' (below), and today's 'kid' is the one closest to the anaconda-size 'trunk' flute at the bottom. I had not yet split it, only cut the mouthpiece area (which is on the right end) and sanded the rough areas off the flute

It just so happens I tuned all of these to Verdi frequencies..today's is a high B...the top one pictured is a high C#....followed by a lovely straight, bright mid G...and then the bottom Bahama Mama is a bass A# that would astound you by how very little breath it takes to play and still get a rich, full tone.

Not to tease you, but I'm not taking just any ol' snapshot of the finished product just to include it in this post...this was more to give you an idea of what processes I work through. I tap the 'nest' sound holes just like a regular flute, 'guess' at the tuning hole and tweak until I get a solid fundamental note, just like a regular flute. I then measure and drop the finger holes where they need to go, though it is a bit trickier with a curvy piece with uneven wall thicknesses...still, pretty close to how I do a regular flute. The difference is that when you get it all done and then add all the finishing work, I have something rather extraordinary when I compare to the old stick I found lying on the ground. This particular piece has some gorgeous coloration and patterning in it that I'll get close-ups of...it's worth the wait, I promise!

Well, when the weather cooperates, the pics will come forth...I will be unable to do a video insert for a few days due to a few temporary technical issues, but I think you'd like to hear and see them being played. As I always say, "Stay tuned!"


Thursday, May 07, 2009

NOTE: IT CAME TO MY ATTENTION THAT THE NEW STYLE OF VIDEO LINK AT THE END OF THIS POST IS "ACTIVE-X ENABLED", AND FOR SOME USING INTERNET EXPLORER YOU MAY NOT SEE THE LINK AT ALL UNLESS YOU "ENABLE" ACTIVE-X FOR THIS VIDEO. IN THE FUTURE YOU CAN GO TO "TOOLS", THEN "INTERNET OPTIONS", THEN "SECURITY" AND LIST THIS WEBSITE AS AN 'ALLOWED' SITE. FUTURE VIDEOS WILL THEN SHOW UP, AS I PLAN ON DOING MORE IN THIS FORMAT. SORRY FOR ANY TROUBLE THIS MAY HAVE CAUSED SOME OF YOU!

-------------------------------------------------

(CLICK ON PICS TO ENLARGE)


PigPen is who I looked like last weekend as I was carving out this particular walking cane branch flute. It's now ready for sanding and finishing, and I thought I'd share it with you and try something new: shooting a video and putting it on the website. I'm sure those will get better, but at least it's a start and a nice new twist to the blogs.

Inbetween showers I went on the back deck to shoot the video below just once. Looking for more storms today, so not sure if and when I can get the sander outside to start finishing up. I'll start with a pic of the flute that is presently 38.5" long/tall. For my first 3 branch flutes (and next 2) I'm using relatively straight pieces of old, downed/dead cedar that I pick up on occasion when I walk Mercy. While I didn't take a picture of what it looked like before, I took a picture of it up against another potentail walking cane 'branch' flute that has already been cut in half and retaped for later carving...

"Branch" flute is a bit of a misnomer as this particular piece is not a branch but the main trunk. As a result, it has more of the white sapwood around the rich red heartwood center...as I sand the red streaks may or may not show up, so it's always fun to 'see whatcha get' and, regardless, it's always pretty when it's been sanded and rubbed down with oil. Nothing like the texture of wood...

If you want to shoot a tricky shot, hold a cane in a left hand and stick your right hand out and blindly shoot back at yourself!

Though it doesn't show up too well, I scallopped around each finger hole using the edge of my orbital palm sander, and it makes for a very comfortable grip. May try that more in the future with the branch flutes...the flute is also surprisingly light in weight, not only because it's mostly hollow inside, but the old dry wood is light weight to begin with.

I never was sure from the start what I was going to do with this flute, so I played it safe and did not bore all the way to the end of the flute...if I do let this be a cane, the added 'beef' at the bottom would be good to have. I have the option of not going with a 'cane' idea and cutting off the solid section and it won't effect the flute as I've already established the 'musical' barrel length by putting in tuning holes. Yet another option is to use the 4" long solid area to carve something neat and let it be an ornate branch flute...things that make you go 'hmmmmm.....'

It may be that the 'red' is not far under the surface, but there is plenty of character in the wood as it is...and I definitely want to oversand and change the 'natural' look and feel of it...

Flute-making is a on-going experiment...and on the next one I think I'll 'de-shag' the bark before cutting it in half...the reason is that with these particular pieces I've picked up and used for flutes, they have numerous cracks in them. The one below just happened to run along the top of the flute, but I didn't see it until after I'd cut out the 'nest' where the block sits, establishing the 'top' of the flute. It's easily neutralized with one of 3 viscosities of professional CA glue (cyanoacrylate or 'super' glue) that I allow to soak into the fibers over a few doses, and it looks neat when done. It's just that this big 'un had a whole lot of little cracks and openings and it took some time to get them all. You would be amazed how the tiniest of air leaks, cracks, can stop or significantly alter the sound quality of a flute...

I kept the end rounded off for now...still at that experimental stage on whether to make a leather bonnet to go over it while you use it as a cane, or get fancier with a 'handle' of sorts that pops on and off...mulling all that over. Plenty of rich, purple-red heartwood in the center, for sure!


And now for your viewing pleasure, the cane flute in action. At first it was a low B, but after tapping holes the fundamental was just not comfortably solid enough for me, so i lifted it a half step to low C. And without boring you with details, it all came together as a low C# using Verdi frequencies (I'm tellin' ya, I really like the stuff!). Enjoy! (FYI, videos don't enlarge, and you have to hit the arrow in the bottom left to play...audio comes out surprisingly clear!)


If this works well enough, I'll go back and make samples of the first two Verdi flutes I blogged about, the low E and my first 'branch' flute in A. That is, as long as more tornadoes aren't whipping around close by today...!

Tuesday, April 28, 2009

One of the most important states of being in creating a peaceful, harmonious life is practicing 'detachment'. True detachment. It doesn't mean being a hermit and cutting yourself off from everyone...it means not letting people, objects, feelings become so 'attached' to you, mentally, that they meld with your sense of identity...that any idea of 'losing' that 'attachment' will somehow 'take away' from who you are...

Easier said than done, I know. Masters know the simple beauty and truth in it because they practice it. I think we've all heard/read the 'love' verse that says if you love something set it free...that's the idea, anyway. And so I come to those questions from time to time with certain flutes. I am often asked, "Have you ever sold any flutes you wish you'd kept?" The honest answer is 'yes', but knowing it's a necessary 'step' since the beauty and medicine of this sacred instrument needs to be shared and spread around, not hoarded. OK, and bills need to be paid, who's kidding whom!

I had been corresponding with a prospective 'parent' over particular flutes and keys, getting a feel for what they were looking for...and as is oft the case, it gets into matters of Spirit and the Heart. There's a lot of 'gut feeling' involved, messages from beyond...a lot gets 'spoken' without ever being written. It's a neat thing, really...quite vibrant. I say 'parent' as I view my flutes as my 'kids', so I refer to them as being adopted, not sold. They're much more than pieces of wood that play sweet music.

When I had completed the (low E-flat) Praying Eagle flute below, I knew it was a keeper. Oh, it was offered to a select few people that ultimately passed on it...it is one of the most amazing playing flutes, too, with an upper register that can be cleanly played with the lightest of breaths...for experienced flute players with superior breath control, this instrument will play just about anything any way. How could I offer it for adoption now?

Well, I did. It's Iowa-bound as I type, along with a couple of other siblings. Deep down I know there will be other really great flutes that will be created, and I'll cross that dilemma-bridge all over again. Actually, I already am with my first two Verdi-tuned flutes, the low E and branch flute from an earlier blog post. I am not releasing those at this time, and may not...they will let me know if and when there is such a time to move on. The Praying Eagle did.

(click on pics to enlarge)


I'm applying for membership in the prestigious Southern Highlands Craft Guild, and should I make it to Stage 2 I will need to deliver 2 flutes for their close scrutiny...the Eagle was to be one of them, so I had to tell myself to get my rear in gear and crank out a couple of real beauties should I need them for a summer drop-off. I could recreate the eagle, but the natural piece of Ironwood it's sitting on is most unique and helps 'make' the look complete...I'd have to search really hard to find something that would work as well.

One of the other siblings traveling with it is a flute that I've had since last spring or summer. It's a true North Carolina flute made from figured Cherry from Asheville and a block and end cap of Ambrosia Maple from Rowan County north of Charlotte. It was a nice playing low E...pretty to look at, pretty sounding, but no one went for it. Because this new 'parent' was looking originally for low D/E flutes, I pulled those flutes and put them through their paces. I thought the others were flat, but what it was was that this next flute was actually a tad sharp.

Long story short, I had an "aHA!" moment and shifted the flute into a Verdi-tuned F a few weeks ago. It's yet another story of something 'magical' that defies quantifiable description as that flute exploded in personality and playability with it's new 'voice'. It's bouncy and bright and delightfully responsive. All I can do is smile since I can't explain it.


The Ambrosia Maple was gifted to me by a fellow flute-maker Mark...it was this hefty rectangular chunk that I decided to cross-cut into pieces for blocks and caps, and it came out with these wonderfully wild designs. Part of the joy of woodworking!

The third of the Three Amigos is one of my specialty flutes, a high F# with an extended slow-air chamber. The body is Black Limba (Africa), a wood known as a great 'tonal' wood and used in many acoustic instruments for its resonance properties. The flat-bottomed design ("Half-Pipe") allows for a lot more variation in finger hole diameter and placement than a round-bore high F#. A beginner player would have a bit longer adjustment period to get used to the odd finger hole pattern, but even with my big paws I can toodle along quickly with it, as tight as they are.


In the above pic, the mouthpiece would be to the left and the 'foot' end to the right. This is for those who play left-over-right, which is the vast majority of players...in flute-making, a hole is placed 'x' distance from the sound hole, or at least the dot for the hole. If you were to draw a line perpendicular to the barrel at a particular dot, that represents the line on which the hole can be dropped and still play the same note. I have developed the above pattern after a lot of trial and error and playing time, and it's a pretty ergonometric design, very comfortable and natural. If I were to put all the holes in one line, they would be way too close together to play...fingers wouldn't fit tightly enough to prevent air leaks at the holes.

Now to the drawing board for today. Lots of ideas on paper that I need to translate into wood, once I decide on the particulars. The weather continues to be user-friendly, for which I am thankful!

Tuesday, April 21, 2009

"By the sea, by the sea, by the beautiful sea..."

Ah, my good ol' barbershop days...hearing in my head the Cincinatti Kids quartet singing the 'title' song on a CD of theirs...


Well, my mid-F# "Sea Flute" (made of spalted, quartersawn Sycamore) is finished. I blogged about it recently on how the key shift left me with a predicament, where I had to cut a perfectly good flute and make some critical adjustments for a customer. In that blog I had not talked about the block or shown it (because it wasn't completed!)...a neat creation on how it came about.

I'm glad I opted for the turquoise bird inlay at the flute 'foot'...from the older post you may remember the bottom was too thin for a band inlay all the way around due to oversanding of the tuning hole I had to remove. I'm pleased with it's look and balance.

For the block, a seagull of sorts was requested. At first I was thinking a simple shape that maybe was painted in the motif of a gull...and, typical of how I approach a lot of what I do with my art, I started going to town. I used a general but more 'involved' design I'd used on that stunning piece of Cocobolo with the head-down Eagle (prior post), and I figured I'd paint it like a gull.

The only problem was that as I went to research pictures of gulls, there are myriad pattern and coloration variations...so I picked one and began painting. I hated it. OK, hate is a little strong, but I knew that wasn't going to satisfy my 'vision', and so I took the wood burning pen and roughly put in feathers and such. I tried to realistically paint it again. Nope. Wasn't working either...in fact, the burning lines made painting much harder on that small surface...and then it hit me.

I'd done it before on other pieces of art and flutes...you paint something and then 'distress' it by taking fine sandpaper and lightly going over the piece, letting some bare wood show through and ending up with a piece that looks folk-artish and weathered...and what is more weathered than things exposed to the salty sea air? Once I did that, I really really liked the look of it. While the flute has a gloss finish, I opted for a satin finish for the gull, as it 'fit in' better. Too, where the lace is wrapped, I left the wood wavy to mimic beach sand (though little is visible with the lace in place)...

(click on pics to enlarge)


Now I wait to simply hear back, since any custom order client has the opportunity to say yay or nay. By the way, did you hear about the love affair at sea? A classic case of 'buoy' meeting 'gull'...

Monday, April 13, 2009

I collected/reclaimed some cedar and dogwood logs from a forested area that was ripped down a couple of years ago. I held on to this particular stick of cedar thinking one day I'd split it and make a 'branch flute'. There are some flute makers who do this exclusively, and it's a neat concept. Certainly some of the earliest aboriginal flutes were made this way...split, hollowed out, and the lashed back together using sinew and natural adhesives. Ah, if it were only that easy!
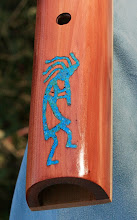
Anyway, I had a hankering to split it and try my hand at it...next time I'll take pictures of all the steps, but in this case I just flew into it rather quickly. I used a Dremel tool and cutter heads to work at hollowing out the heartwood (thankfully, cedar is quite soft and easy to work)...get's tricky because you don't want to cut too close to the outside.

Long story short, I hollowed it to my satisfaction and glued it up overnight. Making the 'nest' area for the block and sound hole mechanisms creates some obstacles to overcome. I have various tools that will make it easier in the future, but I chose a flattish area and filed it to a usable size. Given the length and the bore I cut, I knew I had to drop a tuning hole somewhere down the flute, so I found a small knot area that seemed to be about the right proportion that I needed, location-wise, and burned it out. Very natural looking hole, if I do say so myself.

The wood had a significant number of long cracks, the worst of which I filled in with CA glue (super glue) and a little bit with Bali Coral powder. I at first used varnish to fill in the smaller cracks because it dries so quickly; however, I didn't like the 'look' and took 400-grit sandpaper and sanded it off, being careful to preserve as much of the woods natural form and beauty as I could. Once I got it off, I went back to multiple hand-rubbed coats of "salad bowl finish", a nice penetrating oil that dries hard and 'safe'. The lustre of this flute is really gorgeous.


Well, wouldn't you know it...when I checked the flute for a fundamental, I got a perfectly clear note that was a hair under "A", and given this happened right at my "Verdi A432" epiphany, I tuned this puppy Verdi-style. I really do plan on getting a video/audio sample of my playing it, maybe today, so I can embed it into the blog (stay tuned!)


(click on pics to enlarge)


In the pictures you notice there is no block/fetish...I kept trying different blocks but they just didn't go with the flute. I returned to the same area and picked up old pieces of cedar to see if I could come up with a unique but naturally shaped block...


Alas, I took a small, simple piece and 'roughed it' into a modest, low profile bird...and it seems to fit the flute perfectly as the body gets to stand out front and center...


It's a dream-flute that I will keep in my stead, along with the original low E Verdi I blogged about earlier. They are not only special but 2 of the finest playing flutes I've made. Too, they're matched Verdis, so I can record them together. Ah, where are those 36-hour days I need???